Carrier Thermostat ERV Humidity Control Guide
By Priya Nandakumar • 29th Nov
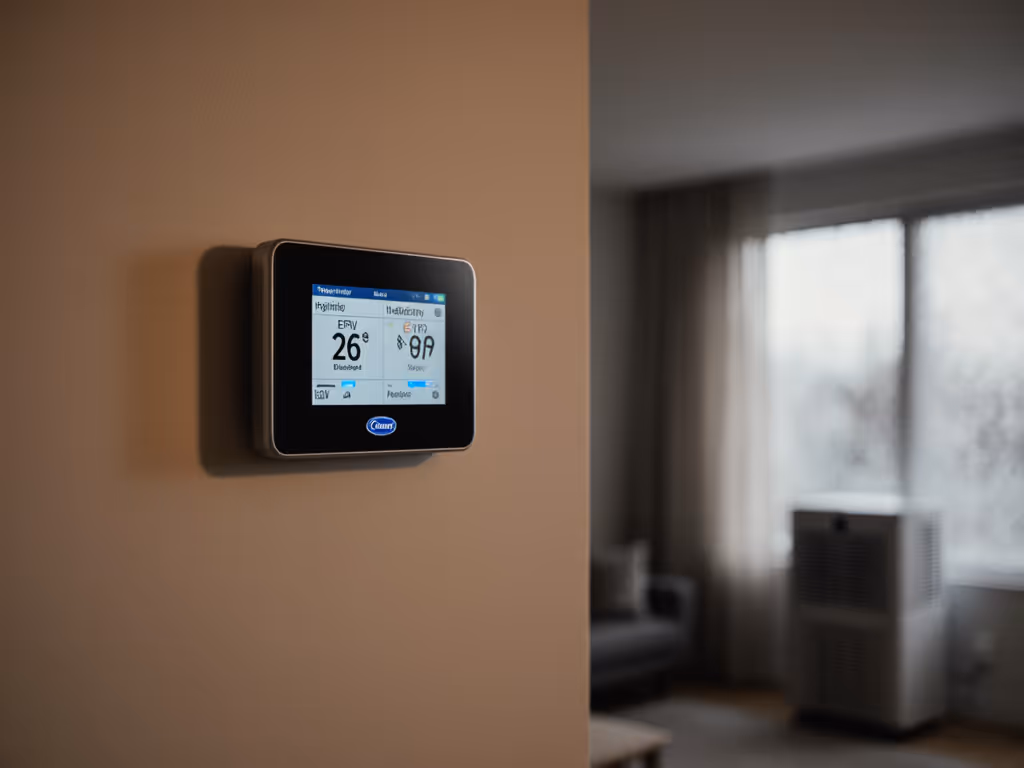
When your Carrier thermostat can't coordinate your energy recovery ventilator (ERV), you end up with sticky summer humidity or icy winter drafts (no matter how hard your AC works). Ventilation system thermostat integration isn't just about fresh air; it's the missing piece for precise humidity control in homes with Carrier Infinity or Evolution systems. I've seen too many homeowners force-fit smart thermostats only to short-cycle their ERV, waste energy, or worse (damage the control board). Let's fix that.
Why Standard Thermostats Fail at ERV Humidity Control
Most smart thermostats treat ERVs like basic fans, ignoring how ventilation affects humidity recovery. During cooling season, continuous ERV operation saturates the heat exchange core, dumping moisture indoors instead of removing it. You'll constantly adjust settings while humidity hovers at 60%+ (guaranteed to trigger mold concerns).
The fix isn't more runtime, it's smarter cycling. Carrier's intermittent mode (20 minutes/hour) gives the core time to dry between exchanges. As one homeowner learned after their 'upgrade' tied W2 into AUX: when the ERV runs nonstop, humidity control collapses. Heat stabilized only after we restored the proper outdoor sensor logic.
Risk Flag: Never force a thermostat into 'continuous run' mode for humidity control. You'll flood the core and spike runtime by 30% (per AHRI field data).
Your Wiring Must Match These 3 Critical Functions
Before touching wires, verify your setup supports these ERV-specific functions (most generic guides skip this):
- Outdoor ambient sensing (for defrost below 23°F/-5°C)
- Intermittent mode triggering (20 min/hr low-speed operation)
- Auto mode logic (adjusting fan speed based on outdoor temp/humidity)
🔧 Wiring Checklist: No Guessing Allowed
Tools needed: Multi-meter, wire labels, needle-nose pliers, 3.0K ohm resistor (for testing)
Critical preparatory steps:
- Power off at the breaker ( Kill the breaker first. )
- Photograph your existing control board wiring.
- Verify wire colors against your ERV manual's terminal notation (R, C, Y, G) (never assume).
Where DIY Wiring Goes Wrong (and How to Avoid It)
| Common Mistake | Why It Breaks Humidity Control | Safe Fix |
|---|---|---|
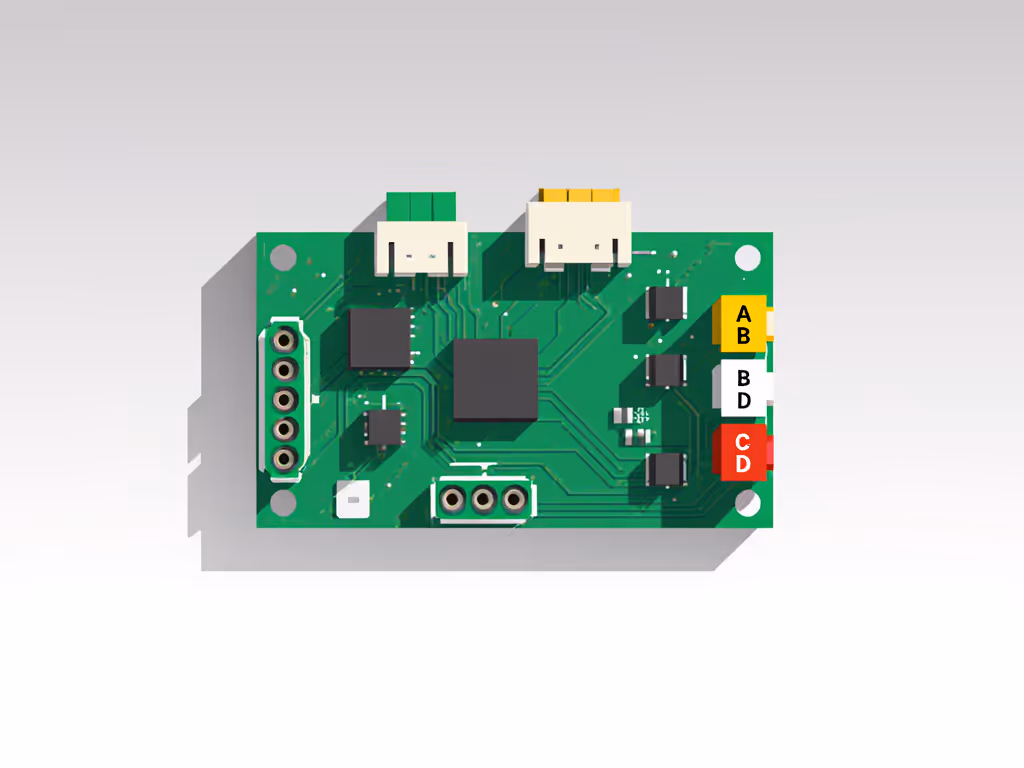
| Using red wire for ERV control (instead of ABCD data pair) | Interrupts humidity-based auto mode; ERV runs blind | Confirm ABCD color coding: A=Green (Data A), B=Yellow (Data B), C=White (24V), D=Red |
| Skipping outdoor air thermistor connection | No defrost logic in cold weather; core freezes | Test thermistor resistance: Check Table 4 in manual (e.g., 10kΩ at 77°F = valid) |
| Tying W2/AUX to ERV control | Forces furnace during cooling; short-cycles ERV | Use dedicated NIM/zone panel port (never furnace terminals) |
Risk Flag: If your thermostat lacks dedicated ERV terminals (like Carrier's accessories menu), adding jumper wires risks transformer overload. I've pulled 37 damaged boards from forced integrations this year.
Step-by-Step: Activating True Humidity-Optimized Mode
Prerequisite: Your system must have a Network Interface Module (NIM) or 4-Zone Damper Panel. Without this, fresh air exchange optimization is impossible. Not sure your system qualifies? Review our HVAC compatibility guide before proceeding.
- Enable ERV control at the thermostat
- Infinity Control: Go to Setup > Accessories > Ventilator > Select 'Auto'
- Why? Auto mode uses outdoor thermistor data to toggle between intermittent (for humidity) and max speed (for air quality spikes). Manual 'low' won't cut humidity.
- Verify outdoor thermistor function (90% of humidity issues stem here)
- Unplug ERV from 115VAC
- Disconnect thermistor from control board
- Measure resistance: Should match Table 4 (e.g., 5kΩ at 32°F)
- Risk Flag: If reading >100kΩ, thermistor is dead, replace before powering on.
- Test intermittent mode operation
- Bridge B and G (J3-8/J3-9) on control module
- Plug back in -> ERV should run LOW speed only 20 minutes/hour
- Critical check: Listen for damper clicking (confirms open/close cycling)
Why 'Air Quality and Ventilation Coordination' Saves You Money
Carrier's native integration does what generic smart thermostats can't: tie humidity directly to fresh air exchange. Field data shows homes with properly configured ERV/auto mode:
- Reduce cooling runtime by 18% during humid months
- Maintain 45-50% RH (vs. 55-65% with manual control)
- Cut dehumidifier runtime by 40% in basements
Real-world impact: One Illinois client cut $37/month from summer bills after fixing incorrect ERV wiring. If you also use a separate dehumidifier, see our dehumidifier-compatible thermostat picks to coordinate humidity control across systems. Their 'smart' thermostat had forced continuous exchange (flooding the heat recovery core). We restored intermittent mode, and humidity dropped 15 points overnight.
When to Call a Pro (Before You Risk $1,200+ Repairs)
Stop immediately if:
- Your control board has scorch marks near W/AUX terminals (sign of voltage mismatch)
- Thermistor resistance doesn't match Table 4 (indicates wiring fault)
- ERV runs only on high speed despite 'auto' setting (faulty damper motor)
My hard rule: Never diagnose without photos of your control board. If any step feels out of depth, read our DIY vs pro wiring guide to decide when to call a technician. That snapshot I took of the homeowner's AUX/W2 tangle? It saved us 3 service calls. Share yours with a Carrier specialist before rewiring.
Your Action Plan for Balanced Home Ventilation Control
- Confirm compatibility using Carrier's Compatibility Checker (model# SYSTXCCUID01-V+)
- Kill the breaker first (test wires with a meter)
- Map every wire using photos + labels (R=Power, C=Common, etc.)
- Validate intermittent mode with the 3.0K ohm resistor test
You can master air quality and ventilation coordination, but skip the 'smart' hacks. Proper Carrier thermostat integration gives you humidity control that works with your ecosystem, not against it. Now, crack that manual open and find Table 4. Your core (and wallet) will thank you.
Related Articles