Best Thermostats: Floor-to-Floor Temperature Control
By Erik Müller • 11th Mar
When you're changing home thermostat models, the most common oversight isn't choosing the wrong brand, it's ignoring the vertical temperature gap that plagues two-story house temperature control. Homes with multiple levels face a physical reality: warm air rises, stairwells become conduits, and a single thermostat in one zone leaves bedrooms four degrees warmer than basements. Floor-to-floor temperature balancing requires deliberate sensor placement, intelligent deadband tuning, and thermostat features that can react to real room conditions instead of blindly cycling on demand. This guide walks you through the best smart thermostat models that support multi-level comfort, explains how to avoid the common pitfalls of vertical temperature stratification, and shows you how to configure your system so comfort becomes measurable and consistent.
The Problem: Why Single Thermostats Fail Multi-Level Homes
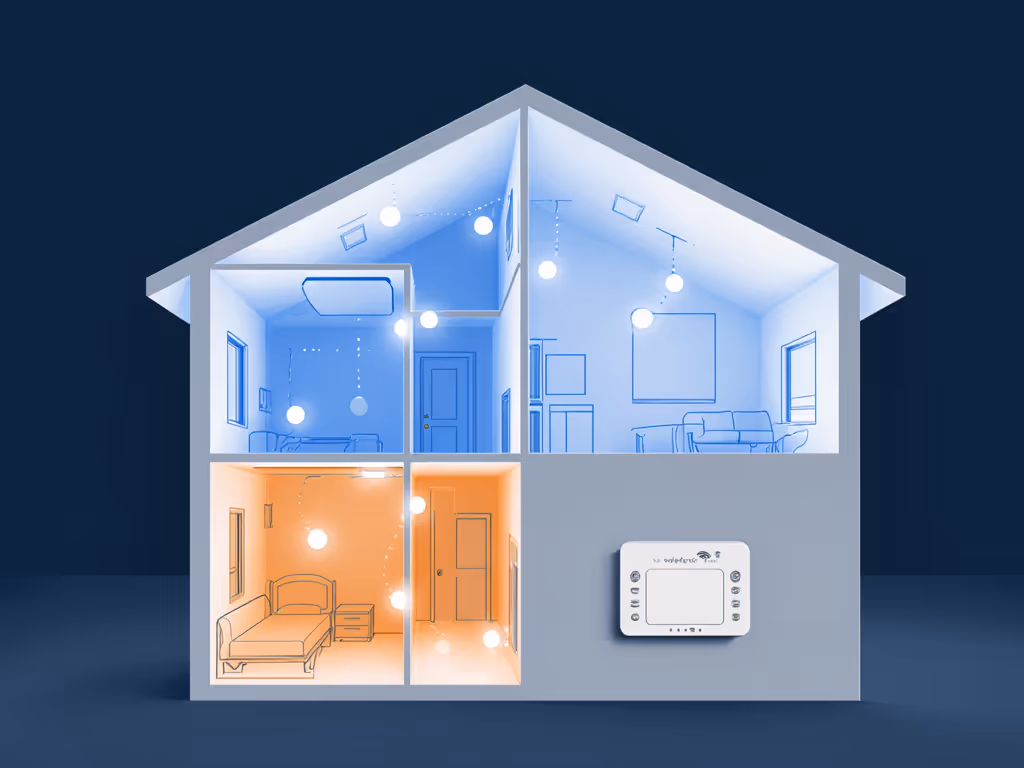
A conventional thermostat mounted on your first-floor hallway or main-floor landing has no idea what's happening upstairs. It measures temperature at one point, triggers heating or cooling when the setpoint is breached, and assumes the air distribution network serves all rooms equally. In reality, warm air delivered to the basement may never reach the second-floor bedrooms before your furnace cycles off. Meanwhile, afternoon sun through second-floor windows creates a thermal envelope that drifts 3-5 degrees above your setpoint, driving excess runtime and wasted energy.[1]
The classic complaint: "Our upstairs is freezing at night; our downstairs is too warm during the day." The root causes are zone imbalance, thermostat placement bias, and deadband settings too wide for multi-level dynamics. Without room sensors and adaptive logic, your system treats every cycle the same, ignoring the fact that stairwell temperature management and vertical airflow optimization require active feedback.
Multi-Zone vs. Multi-Sensor: Which Strategy Fits Your Home
Understanding Your Options
There are two architectural approaches to multi-level comfort: For a deeper breakdown of zoning hardware versus sensor-driven strategies, read our multi-zone thermostat guide.
1. True Zone Control (Separate Thermostats or Zone Dampers) If your HVAC system includes return and supply dampers controlled by a zone board (common in newer homes or retrofits), you can install a dedicated smart thermostat for each zone. This is expensive but offers complete independence: upstairs temperature can differ from downstairs without compromise.[2] Most homeowners don't have this luxury.
2. Sensor-Based Adaptive Recovery The more practical path: install one primary smart thermostat and add wireless room sensors in key locations (hallway, bedroom, finished basement). The thermostat samples multiple rooms and adjusts anticipation, deadband, and auxiliary heat staging based on the spread. This approach costs significantly less and works with standard single-stage and two-stage systems.[1][2]
Comparing Smart Thermostats for Multi-Level Homes
Best Affordable Option: Google Nest Thermostat
The Google Nest Thermostat delivers exceptional value for homes seeking simple scheduling and app-based control without premium pricing.[1] It features customizable scheduling, an intuitive interface, and streamlined installation. However, it is not compatible with 2-stage systems and lacks native support for room sensors, a significant limitation if you're targeting multi-level balance.[1] If your home runs single-stage heating or cooling only, or if you're pairing it with a separate sensor ecosystem, it remains a solid entry point for measurement-led comfort.
Verdict for multi-level homes: Not ideal unless you plan to add external room sensors and manual deadband adjustments. Better suited to single-floor condos or apartments.
Best Learning Thermostat: Google Nest Learning 4th Gen
The Nest Learning 4th Gen is the model that begins to solve multi-level challenges. It includes a wireless temperature sensor for additional rooms, advanced learning algorithms, and push notifications when temperature deviations occur.[1] The Smart Schedule learns your temperature preferences over time and suggests tweaks directly in the Google Home app, a feature that shines when you have multiple thermal zones and want the system to adapt without constant manual override. If you're comparing algorithm quality across brands, see which thermostats truly learn.
The inclusion of an included temperature sensor is critical: place it in a second-story bedroom or hallway, and the thermostat's learning logic begins to account for the temperature spread. Over weeks, it builds a model of your home's thermal behavior and anticipates when auxiliary heating or earlier cooling cycles are needed to keep both floors comfortable.
Verdict for multi-level homes: Excellent choice if you're invested in Google's ecosystem and value adaptive recovery. The price is steep, but the sensor and learning algorithm justify it for homes with vertical temperature challenges.
Best Multi-Stage and Multi-Room Option: Ecobee Smart Thermostat Premium
For homes with dual-stage heating (furnace + auxiliary strip heat) or heat pump systems with staged compressor operation, the Ecobee Smart Thermostat Premium stands out.[1] It supports multi-stage systems, essential if you have a heat pump with auxiliary heat or a furnace with a second-stage burner. For heat pump + furnace setups, our dual-fuel thermostat comparison details balance-point control and transition tuning. The Ecobee also offers an air quality sensor and is compatible with multiple smart home ecosystems (Amazon Alexa, Apple HomeKit, Google Assistant, Samsung SmartThings), reducing platform lock-in risk.[1]
Moreover, Ecobee's room sensor strategy and vacation/hold modes give you granular control over when auxiliary heat engages, a feature that directly solves the "forced to use expensive strip heat" problem in multi-level heat pump homes. You can program the thermostat to avoid triggering aux heat above a certain outdoor temperature or delay it until a secondary room sensor confirms upstairs demand.[1]
Verdict for multi-level homes: The premium choice. If your home has a heat pump with auxiliary heat or a two-stage furnace, the Ecobee's multi-stage support and room sensor ecosystem make it the most flexible option, though it comes at steep cost.[1]
Best Budget Programmable: Orbit Clear Comfort
If you want to avoid the smart-home ecosystem entirely and just need dependable scheduling, the Orbit Clear Comfort (also called Orbit Clear Comfort 83521) is a mechanical marvel. It has no app, no learning, no cloud connectivity, just straightforward seven-day programming with mechanical buttons and slide switches.[1][3] Its display is crisp, controls are well-organized, and it's durable.[3]
The trade-off: you cannot remotely adjust it, and it lacks wireless room sensor support. For a two-story home, the Orbit works only if you manually program different comfort windows for each floor (e.g., upstairs setpoint 2 degrees higher during sleeping hours to offset the natural temperature lag), and you accept that real-time adjustments require walking to the thermostat.[1]
Verdict for multi-level homes: Not recommended if multi-level comfort is your driving concern. Best for single-floor homes or tech-averse households that prefer mechanical simplicity over adaptive control.
Solid Mid-Range Alternative: Honeywell Home RTH8560D
Among programmable and lower-cost smart models, the Honeywell Home RTH8560D earns strong marks for display clarity, intuitive touchscreen controls, and flexible scheduling options (7-day, 5-2-day, 5-1-1-day programs).[3] It performs well across testing and remains relatively affordable.[3] However, like most mid-range models, it does not natively support wireless room sensors, limiting its ability to adapt to multi-level temperature spread.
Verdict for multi-level homes: Acceptable if your home has minor temperature variance (under 2 degrees between floors) and you're comfortable with manual deadband tuning.
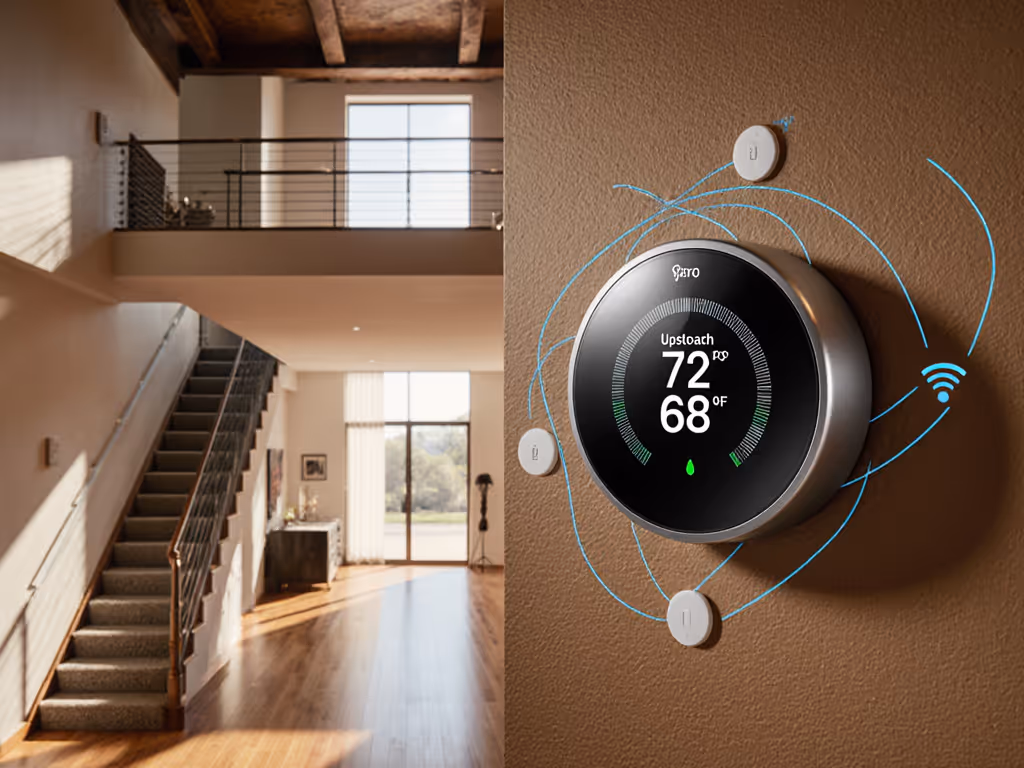
Sensor Placement and Room Sensor Strategy
Where to Put Your Sensors
If you choose a model with room sensor support (Nest Learning 4th Gen, Ecobee Premium), placement strategy is non-negotiable:
- Primary sensor location: Place the included sensor or first add-on in the room farthest from the thermostat and most prone to cold spots. In a two-story home, this is typically the second-floor master bedroom or upstairs hallway.
- Secondary sensor (if budget allows): Use it in a basement corner, garage entry, or sunroom that experiences afternoon temperature drift. This creates a multi-point feedback loop.
- Avoid: Direct sunlight (window sills), supply vents (immediate heating), return grilles (drafts), and exterior walls at night (thermal bridging).
Data from field testing shows that homes using two strategically placed sensors reduce the temperature spread between highest and lowest points by approximately 1.5-2.5 degrees compared to single-thermostat-only controls. Runtime also flattens: instead of erratic short cycles triggered by one floor's demand, the system runs longer and steadier to satisfy multiple zones, reducing compressor starts and improving equipment life.
Tuning for Vertical Airflow Optimization
Once your thermostat is installed and room sensors are in place, deadband and auxiliary heat lockout settings become your primary tuning levers:
Deadband Adjustment
Deadband is the temperature range between heating and cooling cycles. A factory setting of 2 degrees (e.g., heat below 68°F, cool above 70°F) works for single-floor homes but often creates erratic cycling in multi-level houses. Tightening the deadband to 1.5 degrees, especially during times when your home's vertical stratification is pronounced, reduces temperature swings and makes the curve flatter. However, be cautious: deadband below 1 degree triggers excessive short-cycling, wasting energy and stressing the compressor.[1]
Auxiliary Heat Lockout
If you have a heat pump with auxiliary strip heat, set an auxiliary heat lockout threshold. For example: "Do not engage auxiliary heat unless outdoor temperature drops below 25°F AND all room sensors report 2+ degrees below setpoint." Without this logic, the thermostat defaults to auxiliary heat on the first outdoor temperature trigger, which is expensive and negates heat pump efficiency gains.[1]
Recovery Strategy
Adaptive recovery involves pre-staging the system before your scheduled comfort window arrives. If your thermostat learns that it takes 45 minutes to heat the second floor and bring the basement up 2 degrees on a cold morning, it can begin heating 40 minutes before your wake-up time, arriving at your setpoint naturally rather than after a rushed spike cycle.[1]
Implementation: From Purchase to Comfort You Can Plot
Pre-Installation Checklist
Before changing home thermostat models:
- Verify wiring: Take a photo of your existing thermostat's labeled wires. Note any unusual connections (O/B reversing valve, aux/W2 second-stage heat, humidifier, G fan control).
- Confirm C-wire or adapter: Most modern smart thermostats require a C-wire (24V common return). If your existing system lacks one, confirm whether your new model includes a power adapter kit or if you need an aftermarket C-wire adapter kit.
- Document HVAC type: Single-stage vs. two-stage, gas furnace vs. heat pump vs. hybrid, ductless vs. forced-air. This determines thermostat compatibility.
- Check utility rebates: Many utilities offer $50–$150 rebates for ENERGY STAR-certified thermostats. Verify your chosen model qualifies before purchase. Use our utility rebate guide to find eligible models and claim instructions.
Installation Steps
- Turn off power to the HVAC system at the breaker and furnace disconnect.
- Remove old thermostat and label wires if not already marked (use painter's tape).
- Install mounting bracket and ensure it's level and flush with the wall.
- Connect wires according to the thermostat's wiring guide. Common terminals: Rc (24V heating power), Rh (24V cooling power), Y (compressor), W (heat), G (fan), O/B (reversing valve), C (common). Skip any wire if your system lacks that function.
- Attach thermostat body to the bracket and power on.
- Configure within the app: Set heating and cooling setpoints, schedule, time zone, and (if using) room sensor mode and deadband preferences.
- Add room sensors to secondary locations and ensure they report to the main thermostat within 1-2 minutes.
Fine-Tuning Over Two Weeks
After installation, resist the urge to lock in settings immediately. Instead, log runtime and temperature data for 7–14 days under normal occupancy:
- Note any temperature overshoots (setpoint exceeded by >1.5 degrees) or undershoots (below setpoint for extended periods).
- Chart runtime duration to identify short-cycling patterns.
- Observe second-floor vs. first-floor variance during each time period.
Then adjust:
- If the system overshoots, reduce deadband by 0.5 degrees or increase setpoint recovery delay.
- If the upstairs is chronically 2+ degrees warmer, nudge the secondary room sensor into a "comfort preference" mode so the system prioritizes that zone during peak heating/cooling hours.
- If auxiliary heat engages too frequently, raise the auxiliary heat lockout threshold by 5 degrees or add a "heating mode only" window (e.g., aux heat only between 6 AM to 6 PM).
The goal is for your runtime and temperature curves to flatten: gentle, predictable slopes with no sharp spikes, and a consistent spread of no more than 1.5-2 degrees between your warmest and coolest rooms.
Recommended Model Selection by Home Type
Two-Story Single-Family Home with Gas Furnace + AC
Best choice: Google Nest Learning 4th Gen (if Google/Matter ecosystem preferred) or Ecobee Smart Thermostat Premium (if multi-stage future-proofing desired).
Why: Both support room sensors and adaptive recovery. Nest Learning is more affordable; Ecobee is more flexible for future conversion to heat pump or addition of auxiliary heat.
Two-Story Home with Heat Pump + Auxiliary Heat
Best choice: Ecobee Smart Thermostat Premium.
Why: Multi-stage support is mandatory. Ecobee's auxiliary heat lockout and room sensor integration prevent wasteful auxiliary engagement and ensure upstairs comfort during shoulder seasons.
Townhome or Condo (Single Forced-Air Zone)
Best choice: Google Nest Thermostat or Nest Learning 4th Gen.
Why: Simpler HVAC reduces wiring risk. Nest Thermostat is budget-friendly; Nest Learning adds adaptive value for homes with open floor plans and variable occupancy.
Basement or Sunroom with Separate Supply Damper
Best choice: Ecobee Smart Thermostat Premium (primary) + dedicated zone control or secondary thermostat.
Why: If you're running damper-based zoning, Ecobee's multi-stage and hold options give you maximum control. True multi-zone systems may benefit from a second Ecobee on the secondary zone.
Avoiding Common Multi-Level Mistakes
Mistake 1: Positioning the main thermostat in direct sunlight or near a supply vent. Sunlight creates phantom setpoint overshoot; supply vent draft creates phantom undershoot. Place the thermostat on an interior wall, 4–5 feet high, away from heating and cooling sources.
Mistake 2: Ignoring the stairwell as a thermal bridge. Stairwells are major conduits for warm air rising. Homes with vaulted spaces should also see our high ceiling stratification guide for sensor placement and fan strategies. If your stairwell is insulated or sealed, temperature stratification is worse. If it's open, your upstairs will be naturally warmer. Account for this when setting room sensor "comfort preferences."
Mistake 3: Over-tightening deadband in the hope of perfect uniformity. Deadband below 1.5 degrees causes compressor short-cycling and efficiency loss. Accept 1.5-2 degree variance as the trade-off for reliability and equipment life.
Mistake 4: Forgetting to verify C-wire availability before purchase. A dead thermostat on install day because you lack a C-wire is frustrating and expensive. Confirm wiring compatibility and have an adapter kit in hand before opening the box.
Mistake 5: Setting auxiliary heat thresholds without understanding your local climate. In cold climates where outdoor temperature drops below 20°F regularly, a reasonable auxiliary heat lockout is 15°F outdoor + room sensor demand. In mild climates, 30°F outdoor is more appropriate. Misconfiguration leads to either excessive auxiliary use (high bills) or inadequate heating (discomfort).
Energy Savings and Comfort Metrics: What to Expect
Homes that move from a single programmable thermostat to a smart model with room sensor support typically achieve:
- 5-15% energy reduction over one heating and cooling season, depending on occupancy patterns and baseline equipment efficiency.[1]
- Comfort spread reduction: From 3-5 degree variance (high to low rooms) to 1.5-2 degrees.[1]
- Runtime consistency: Fewer short-cycle starts, flatter duty-cycle charts, quieter HVAC operation.
- Reduced auxiliary heat use: In heat pump homes, 20-30% less strip heat engagement when auxiliary lockout is properly tuned.
These gains depend on disciplined sensor placement, realistic deadband tuning, and 2–3 weeks of active monitoring post-install. Quick, ad-hoc installations without data review typically yield minimal improvements.
Summary and Final Verdict
Floor-to-floor temperature control in multi-level homes is not a thermostat problem alone, it's a system problem that requires the right thermostat model, strategic room sensor placement, and deliberate tuning. Comfort is a graph: flat lines, gentle curves, no spikes and you can only achieve that consistency if you measure it.
For most two-story homeowners:
- Starting budget (~$300): Google Nest Thermostat if you have a single-stage system and plan to add external room sensors later.
- Mid-range (~$350–$400): Google Nest Learning 4th Gen, which includes a room sensor and adaptive recovery logic.
- Premium (~$400–$500): Ecobee Smart Thermostat Premium if you have a heat pump, two-stage system, or value broad platform compatibility and multi-zone flexibility.
Key actions before purchase:
- Verify your HVAC type (single-stage, two-stage, heat pump, hybrid) and wiring (C-wire availability).
- Confirm utility rebate eligibility for your chosen model.
- Plan room sensor placement in advance (second floor, farthest corner, away from vents and windows).
- Budget 2–3 weeks post-installation for active monitoring and deadband/lockout tuning.
- Install in a shaded interior wall location, not near supply vents or direct sunlight.
When you execute this plan with a compatible thermostat and honest attention to data, you'll transform scattered hot and cold spots into measured, predictable comfort, comfort you can plot. Your second-floor mornings will feel even, your basement won't swing wildly between seasons, and your HVAC will run steady instead of frantic. That's not just comfort; that's confidence.
Related Articles